
This comprehensive guide provides step-by-step instructions for installing, configuring, and maintaining your Carrier Infinity Thermostat, ensuring optimal performance and energy efficiency for your home comfort system.
The Carrier Infinity Thermostat is a state-of-the-art home automation device designed to provide seamless control over your heating and cooling systems. With its intuitive touch screen interface and Wi-Fi connectivity, it offers advanced features for optimizing comfort and energy efficiency. Compatible with the Carrier Infinity system, this thermostat allows users to manage their home’s climate effortlessly. It is engineered to integrate with various HVAC components, ensuring precise temperature control and smart home integration. This manual will guide you through the installation, configuration, and operation of the Carrier Infinity Thermostat, helping you unlock its full potential for a comfortable and energy-efficient living space.
Pre-Installation Requirements and Compatibility
Before installing the Carrier Infinity Thermostat, ensure compatibility with your HVAC system. It requires a 24V AC power supply and is designed for use with Carrier Infinity systems. Verify that your system supports the thermostat’s advanced features, such as Wi-Fi connectivity and zoning control. Check the wiring requirements, as standard 22 AWG thermostat wire is recommended. For systems exceeding 100 feet, use 20 AWG wire. Additionally, ensure that all system components, including indoor and outdoor units, are compatible with the Infinity Control. Review the installation manual to confirm compatibility and gather necessary tools and materials. Proper preparation ensures a smooth and successful installation process.
2.1. Checking System Compatibility
Ensure your HVAC system is compatible with the Carrier Infinity Thermostat. It requires a 24V AC power supply and works with Carrier Infinity systems. Verify that your system supports features like Wi-Fi and zoning. Check if your system includes compatible indoor and outdoor units. For HRV or ERV integration, ensure the Infinity Network Interface Module (P/N SYSTXCCNIM01) is installed. Refer to the manual for specific compatibility details. Incorrect system pairing may lead to malfunction. Always validate compatibility before proceeding with installation to ensure proper functionality and avoid potential issues. This step is crucial for a seamless setup and optimal performance of your thermostat.
2.2. Gathering Necessary Tools and Materials
Before starting the installation, gather all required tools and materials to ensure a smooth process. You will need a screwdriver set (Phillips and flathead), wire strippers, a voltage tester, and a drill with bits for wall mounting. Additionally, collect materials like wall anchors, screws, and a thermostat mounting kit if not included. For wiring, use 22 AWG or larger thermostat wire, and for lengths over 100 feet, 20 AWG is recommended. Ensure you have a ladder or step stool for safe access. Refer to the manual for specific requirements, as some systems may need additional components like the Infinity Network Interface Module (P/N SYSTXCCNIM01). Having all tools and materials ready will save time and reduce the risk of installation errors.
2.3. Understanding Safety Guidelines
Before proceeding with the installation, it is crucial to understand and follow all safety guidelines to avoid personal injury or system damage. Always disconnect power to the HVAC system at the circuit breaker or fuse box before starting work. Be aware of signal words like “WARNING” or “CAUTION” in the manual, as they indicate potential hazards. Wear protective gear, such as safety glasses, when drilling or handling electrical components. Ensure proper ventilation and avoid touching electrical wires or terminals with bare hands; Follow local electrical codes and regulations. If unsure about any step, consult a licensed professional. Properly handle and secure all connections to prevent system malfunctions. Ignoring safety guidelines may result in injury, system damage, or voiding the warranty. Safety should always be the top priority during installation.
Installation Process Overview
The installation of the Carrier Infinity Thermostat involves several key steps to ensure proper functionality and integration with your HVAC system. Begin by mounting the thermostat on a wall, ensuring it is level and placed in an area with consistent temperature readings. Next, carefully connect the wiring, referring to the manual for specific terminal designations. Once wired, connect the thermostat to your HVAC system, ensuring compatibility and proper communication. After installation, test the system to verify heating, cooling, and Wi-Fi connectivity. The process typically takes 30 minutes to an hour, depending on system complexity. Always follow the provided instructions and safety guidelines. If unsure, consult a licensed professional. Proper installation is essential for optimal performance and energy efficiency. Use this manual as your primary guide for a successful setup.
3.1. Mounting the Thermostat
Mounting the Carrier Infinity Thermostat is a straightforward process that requires attention to detail for optimal performance. Begin by selecting a wall location with consistent temperature readings, avoiding direct sunlight or drafts. Use the provided wall bracket to ensure proper alignment and level placement. For most installations, the recommended mounting height is between 52 and 60 inches from the floor. Once the bracket is secured, gently attach the thermostat to the bracket, ensuring a snug fit. If necessary, adjust the thermostat’s orientation for proper viewing. After mounting, ensure the thermostat is powered and the display lights up. Proper mounting is critical for accurate temperature sensing and system control. Follow the manual’s specific instructions for your model, as slight variations may apply. If unsure, consult a licensed HVAC professional for assistance.

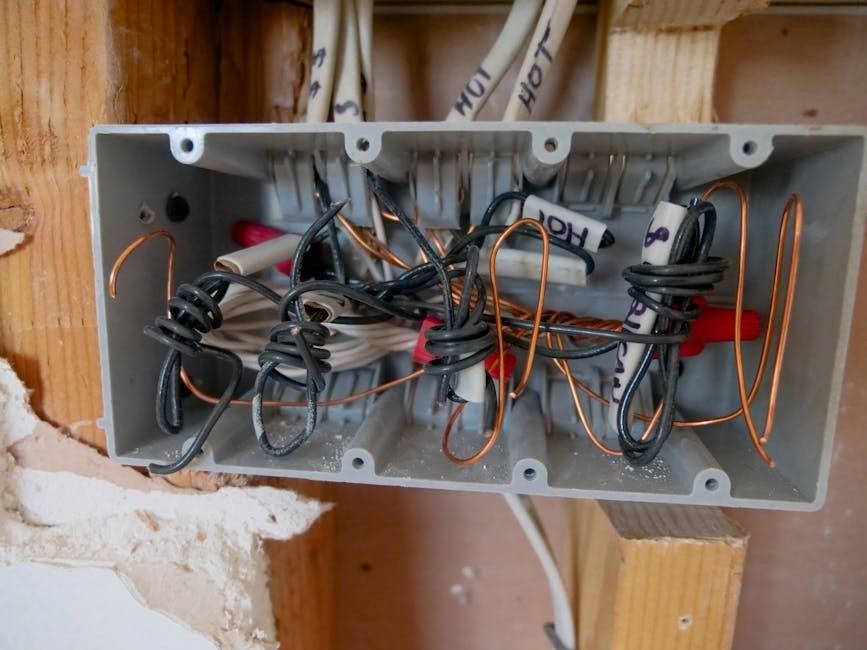
3.2. Wiring the Thermostat
Wiring the Carrier Infinity Thermostat requires careful attention to ensure proper system operation. Begin by turning off the power to your HVAC system at the circuit breaker. Remove the thermostat’s cover to access the wiring terminal. Match the wires from your heating and cooling system to the corresponding terminals on the thermostat, following the labeling (e.g., R, W, Y, G, C). Use 22 AWG or larger wires for standard installations, and 20 AWG for longer runs exceeding 100 feet. Secure all connections tightly to avoid loose wires, which can cause malfunctions. Refer to your specific model’s manual, such as the SYSTXCCITC01, for wiring diagrams. If your system includes advanced components like the Infinity Network Interface Module (NIM), additional wiring steps may apply. Always double-check connections before restoring power to the system.
3.3. Connecting to HVAC Systems
Connecting the Carrier Infinity Thermostat to your HVAC system involves integrating it with your heating, cooling, and ventilation equipment. Ensure the thermostat is compatible with your system, as specified in the manual. For systems requiring additional control outputs, the Infinity Network Interface Module (NIM) may be necessary. This module allows seamless integration with components like HRVs or ERVs without needing separate controls. Once wired, the thermostat communicates with your HVAC system to regulate temperatures and airflow. If your system includes zoned controls or advanced features, refer to the NIM installation guide. Always follow the manufacturer’s instructions for compatibility and proper setup. This ensures optimal performance and energy efficiency, allowing the thermostat to function as the central control for your entire HVAC system.

3.4. Testing the Installation

After completing the installation, thoroughly test the Carrier Infinity Thermostat to ensure proper functionality. Begin by turning on the power supply and verifying the thermostat’s display lights up. Check communication with your HVAC system by running through heating, cooling, and ventilation modes. Ensure the thermostat responds correctly to temperature adjustments. Test Wi-Fi connectivity if applicable, confirming the thermostat connects to your network and any smart home systems. Verify that all programmed schedules and settings operate as intended. Refer to the installation manual for specific testing procedures and troubleshooting steps if issues arise. This process ensures your system is fully operational and integrated, providing reliable performance and energy efficiency for your home comfort needs.
3.5. Final Checks and Adjustments
Once the installation and testing are complete, perform a final review to ensure everything is functioning as expected. Check the thermostat’s display for clarity and responsiveness. Verify that all programmed settings, including schedules and preferences, are correctly configured. Ensure proper calibration of the thermostat’s temperature sensor for accurate readings. Review the system’s airflow balance and adjust dampers if necessary to optimize performance. Test the fan and cycle settings to confirm smooth operation. Finally, review the user manual to ensure all advanced features are enabled and tailored to your comfort needs. Make any necessary fine-tuned adjustments to achieve optimal system performance and energy efficiency before finalizing the setup.
Programming and Setup
Programming your Carrier Infinity Thermostat begins with initial configuration, where you set basic parameters such as date, time, and temperature units. Connect the thermostat to your Wi-Fi network to enable smart features and remote control via the Carrier app. Create a comfort schedule by defining temperature settings for different times of the day and week, optimizing energy usage and comfort. Explore advanced features like geofencing, smart recovery, and energy reports to customize your system further. Ensure all settings are saved and review the schedule for accuracy. Adjust humidity levels, fan settings, and other preferences as needed. Finally, test the programmed settings to ensure smooth operation and make any necessary adjustments for optimal performance and energy efficiency.
4.1. Initial Configuration
Start by powering on the thermostat and following the on-screen prompts to set the date, time, and temperature units (Fahrenheit or Celsius). Select your HVAC system type from the menu to ensure compatibility. Choose your preferred language and review the default settings. If connected to Wi-Fi, the thermostat will automatically update to the latest software. Verify that all system components are recognized and functioning properly. Save your configurations to proceed. This step ensures the thermostat operates correctly with your specific HVAC setup and prepares it for advanced features like scheduling and remote access. Proper initial configuration is crucial for seamless operation and optimal performance of your Carrier Infinity Thermostat.
4.2. Setting Up Wi-Fi Connectivity
To connect your Carrier Infinity Thermostat to Wi-Fi, navigate to the settings menu on the touchscreen display. Select “Wi-Fi Settings” and choose your home network from the available list. Enter your network password using the on-screen keyboard. Once connected, the thermostat will confirm the connection and automatically link to the Carrier portal for remote access. Ensure your router is operational and within range. If issues arise, restart the thermostat and router, then retry the connection process. A stable Wi-Fi connection is essential for features like remote control, software updates, and smart home integration. Refer to your router’s documentation if additional network configuration is required. Proper setup ensures seamless connectivity and enhanced functionality of your thermostat.
4.3. Creating a Comfort Schedule
To create a comfort schedule on your Carrier Infinity Thermostat, access the “Comfort Schedule” menu through the touchscreen interface. Plan your daily temperature preferences by setting specific time points and corresponding temperatures for heating and cooling. For example, set a lower temperature when sleeping or away from home and a higher temperature when active. Use the “Copy” feature to replicate settings across multiple days, ensuring consistency. Adjust the schedule as needed to match your lifestyle. Save your settings to ensure the thermostat follows your preferred comfort levels. Regularly review and update your schedule to optimize energy usage and comfort. This feature allows for precise control, helping you maintain a comfortable home environment while saving energy. Proper scheduling enhances the overall performance of your HVAC system.
4.4. Advanced Features and Customization
The Carrier Infinity Thermostat offers advanced features for enhanced comfort and energy efficiency. Customize settings like geofencing, which adjusts temperatures based on your location, and smart energy reports to track usage. Utilize humidity control to maintain optimal indoor air quality. The thermostat also supports voice commands through smart home systems like Alexa and Google Assistant. Advanced customization options include adjusting temperature ranges, fan operation, and system alerts. These features allow you to tailor the thermostat to your preferences, ensuring maximum comfort and efficiency. Regular updates ensure access to new functionalities, making the Infinity Thermostat a versatile and adaptive solution for home climate control. Proper customization enhances performance and user satisfaction. Explore these features to optimize your home’s comfort system. The Infinity Thermostat is designed to adapt to your lifestyle, providing seamless control over your environment.
Troubleshooting Common Issues
Troubleshooting your Carrier Infinity Thermostat involves identifying and resolving common issues promptly. Connectivity problems, such as lost Wi-Fi connections, can often be resolved by restarting the thermostat or checking your network settings. If the thermostat fails to power on, ensure proper wiring and verify that the circuit breaker hasn’t tripped. For temperature inaccuracies, calibrate the sensor or check for drafts near the device. Software glitches can be addressed by performing a factory reset or updating the thermostat’s firmware. Always refer to the installation manual or online resources for detailed solutions. Regular system checks and updates help prevent malfunctions, ensuring seamless operation and optimal performance of your HVAC system. Addressing issues early enhances efficiency and extends the lifespan of your thermostat.
5.1. Common Installation Mistakes
During the installation of your Carrier Infinity Thermostat, several common mistakes can occur if proper precautions are not taken. One of the most frequent issues is incorrect wiring, which can lead to system malfunctions or safety hazards. Ensure all wires are securely connected to the correct terminals, and avoid using damaged or insufficient gauge wires. Another mistake is failing to verify system compatibility before installation, which may result in poor performance or complete inoperability. Additionally, improper mounting of the thermostat, such as placing it in areas with drafts or extreme temperatures, can affect accuracy. Always follow the installation manual carefully, and double-check connections before powering up the system. Addressing these potential errors ensures a smooth and reliable setup. Proper installation is key to optimal functionality.
5.2. Resolving Connectivity Problems
Connectivity issues with your Carrier Infinity Thermostat can hinder its ability to function properly, especially when integrated with Wi-Fi or smart home systems. Common problems include weak or lost internet connections, incorrect network configurations, or outdated software. To resolve these issues, restart your router and thermostat to establish a fresh connection. Ensure the thermostat is registered to the correct account and that the network name and password are entered accurately. If problems persist, check for firmware updates and install the latest version. Additionally, verify that the thermostat is within range of your router and that no physical obstructions are causing signal interference. Consulting the user manual or contacting customer support can also provide further assistance. Addressing connectivity issues promptly ensures seamless control and optimal performance of your heating and cooling system. Regular checks can prevent future disruptions.
5.3. Addressing System Malfunctions
If your Carrier Infinity Thermostat experiences malfunctions, such as unresponsiveness or incorrect temperature readings, begin by checking the power supply and ensuring proper installation. Verify that all wiring connections are secure and correct. Restart the thermostat and HVAC system to reset the configuration. Check for error codes or messages on the display, as they can indicate specific issues. Ensure the system is compatible with your HVAC equipment and that all components are properly connected. Regularly update the thermostat’s software to maintain optimal performance. Consult the user manual for troubleshooting steps or contact Carrier’s customer support for professional assistance. Addressing malfunctions promptly ensures reliable operation and maintains your home’s comfort. System checks and maintenance can prevent future issues. Always refer to the manual for detailed guidance.
Maintenance and Care
Regular maintenance ensures your Carrier Infinity Thermostat operates efficiently and effectively. Start by cleaning the thermostat with a soft, dry cloth to remove dust and debris. Avoid harsh chemicals or liquids, as they may damage the screen or internal components. Check and update the thermostat’s software periodically to access the latest features and improvements. Inspect the wiring connections to ensure they are secure and free from damage. Replace batteries if applicable, and verify the system’s compatibility with your HVAC equipment. Schedule regular system checks to identify and address potential issues before they escalate. Proper care extends the lifespan of your thermostat and ensures reliable performance. Always refer to the manual for specific maintenance recommendations tailored to your Carrier Infinity Thermostat model.
6.1. Cleaning the Thermostat
Regular cleaning is essential to maintain the performance and accuracy of your Carrier Infinity Thermostat. Power down the thermostat before cleaning to prevent damage or electrical issues. Use a soft, dry cloth to gently wipe the display screen and remove dust or debris. Avoid using harsh chemicals, liquids, or abrasive materials, as they may damage the touchscreen or internal components. For stubborn marks, lightly dampen the cloth with water, but ensure it is not soaking wet to prevent moisture damage. Clean the vents and surrounding areas to ensure proper airflow and system efficiency. Regular cleaning helps maintain accurate temperature readings and ensures the thermostat operates smoothly. Always refer to the manual for specific cleaning recommendations tailored to your Carrier Infinity Thermostat model.
6.2. Updating Software
Keeping your Carrier Infinity Thermostat software up to date ensures optimal performance, security, and access to the latest features. To update the software, first, ensure the thermostat is connected to Wi-Fi by navigating to the settings menu and confirming network connectivity. If not connected, enter your Wi-Fi password to establish a connection. Once online, check the system or firmware update section within the menu. If an update is available, select it and allow the thermostat to download and install the new version. Avoid turning off the device or disconnecting it during the update to prevent issues. After completion, restart the thermostat to apply changes. Verify the update by checking the version number. If issues arise, contact Carrier support for assistance. Regular updates are crucial for maintaining functionality and compatibility with your HVAC system.
6.3. Regular System Checks
Regular system checks are essential to ensure your Carrier Infinity Thermostat operates efficiently and effectively. Start by verifying that all wiring connections are secure and free from damage. Check the air filter and replace it if dirty, as this can impact system performance. Inspect the thermostat’s display for clarity and responsiveness, cleaning the screen as needed. Ensure the device is properly calibrated by running a test cycle for heating and cooling modes. Additionally, verify that the thermostat is level on the wall to maintain accurate temperature readings. Schedule annual professional HVAC system checks to complement thermostat maintenance. Regular checks help prevent malfunctions, optimize energy usage, and extend the lifespan of your system. By staying proactive, you can ensure consistent comfort and reliability year-round.
With the successful installation and setup of your Carrier Infinity Thermostat, you’ve taken a significant step toward enhancing your home’s comfort and energy efficiency. This guide has provided a comprehensive roadmap to help you navigate the process, from initial preparation to final adjustments. By following the outlined steps and maintaining regular checks, you’ll ensure optimal performance and longevity of your system. The Infinity Thermostat’s advanced features, such as Wi-Fi connectivity and programmable scheduling, offer unparalleled control over your home’s climate. Remember to refer to this manual for troubleshooting or future adjustments. Congratulations on upgrading to a smarter, more efficient heating and cooling solution that promises years of reliable service and enhanced comfort for your family.